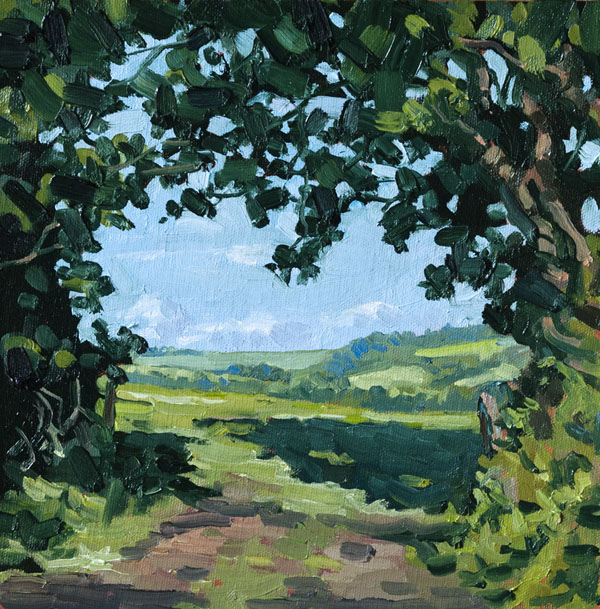
This is to show how I go about painting a quick study. I hope it might help beginners organise their way of working as many paintings come to grief just because of not taking things bit by bit and getting ahead of yourself. This example is done from a photo but my process is similar in the field. I’ve chosen a simple scene so no tricky drawing it is just about the order of the steps. Nothing I do here is prescriptive there are as many ways of getting the job done as there are painters!
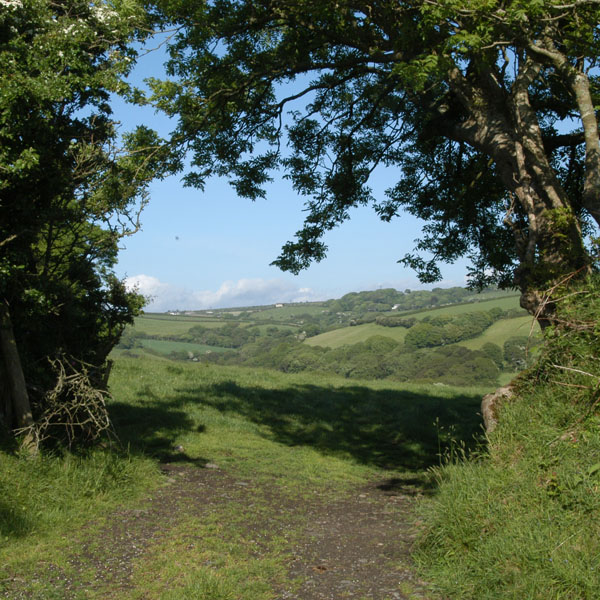
Here’s the photo I intend to work from. It’s from a beautiful day in Cornwall and is near Boscastle. I’ve chosen it as it is a very simple composition with good dramatic contrasts. When you are out looking for subjects it is a good idea to squint at your possible scene to simplify it. A good subject will often have good strong simple shapes. This will need some work but you will see how I proceed.
.
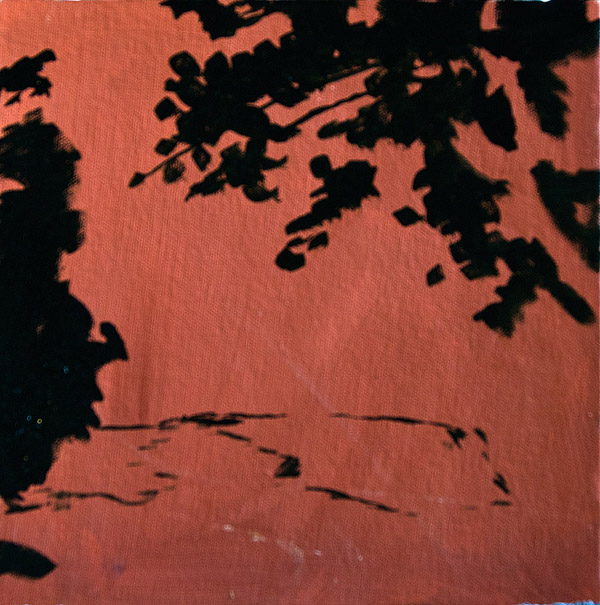
I apologise for the slightly out of focus snap but you can see what I’m doing well enough. Here I am laying in the darkest areas with a thinned colour in this case Sap Green. I am putting down single brush strokes to define areas, avoid any unneeded detail. The board is primed in Red Ochre, I like this for landscape as it gives weight and warmth to natural greens, which are nearly always more red than people imagine. I have also just indicated the shadow areas.
.
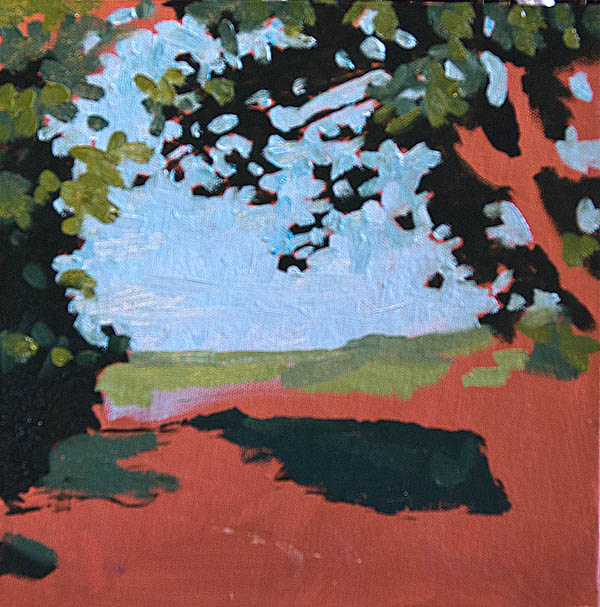
The next thing is the lightest tone. I mix my sky with a few different blues in this case Turquoise and Cobalt Blue. I am using only tiny amounts of colour to add to my Titanium White. I am looking to get just the right balance between my lightest and darkest. You can see in the middle some of my test dabs. Again keep it simple. My next move is to establish some in between greens. I mix them across a reasonable area of palette so I can blend them on the palette surface which gives me a range of tones to pick from. The colours used are: Yellow Ochre Bright Green Lake, and my Sap Green. I am adding very small amounts of Venetian red to take the edge off the ratheracid Bright Green Lake.
.
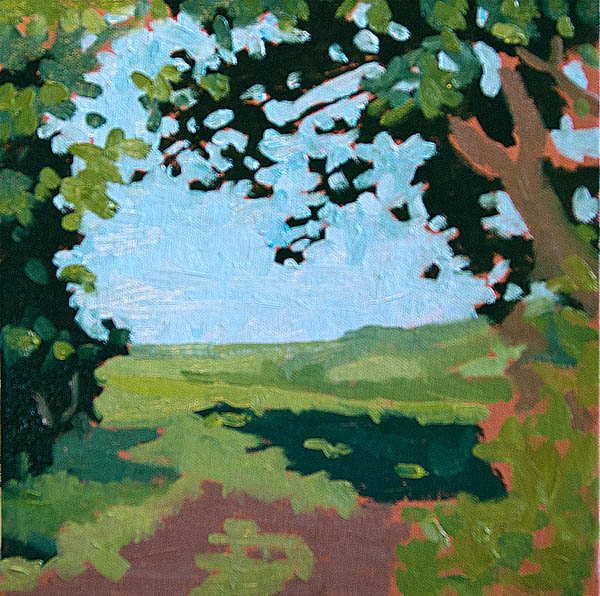
Finally the rest of the slightly stronger greens and the warm tones of the path and the tree trunk. I have kept all my colours slightly muted so they are capable of taking a more intense highlight, leaving me room to emphasise and add punch at a later stage. There is still very little paint on top of paint, I try to keep to one layer at this stage as it can all get very difficult to lay colours on top of each other. But now we have our board covered and the decisions get a bit easier.
.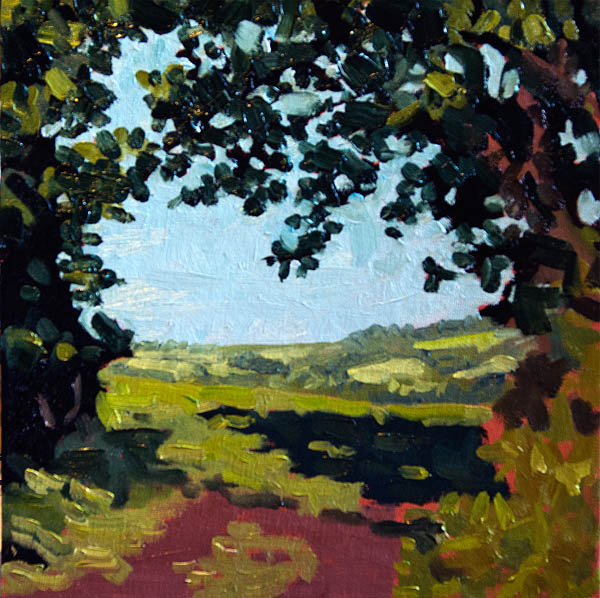
This is the fun part! I have mixed a set of brighter greens and have established a warmer near and cooler in the distance trend. Then I have come back with my dark Sap Green to refine and add more shape to the dark areas. I also drop in some more bits of sky here and there, I usually scrape the under paint away under where the new sky strokes will go using the tip of a palette knife to try to keep the colour clean.
.
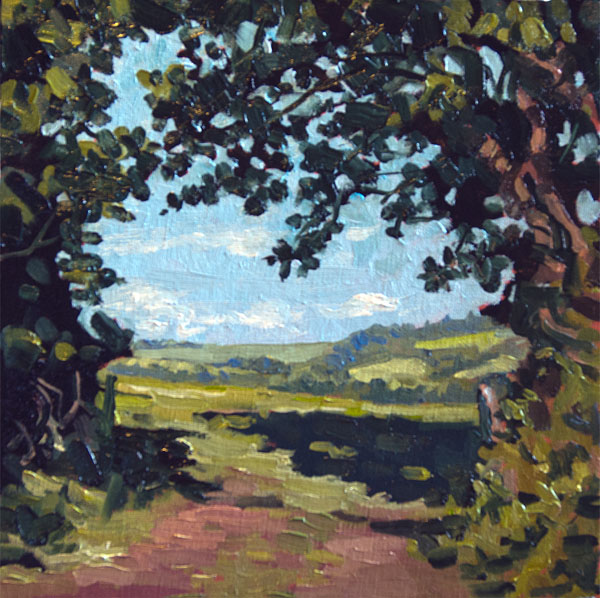
Another step, I have added more touches of detail here and there, and started to remove complication from the backlit leaves. When I put a brush stroke in I try to have an intent in mind, it’s no good dabbing and hoping as only confusion will result! Often the stroke will do something you don’t expect which can be either good or bad depending on your luck. The trick is to keep the good ones and learn from them to make your next set of marks count for more. At this stage I break for a coffee and drink it where I can’t see my painting. This is because when I go back into the studio for a fraction of a second I will see my work afresh.
.
Here it is done, you can click for a bigger view. Usually I would now leave it for a few days and add a final set of corrections. These will mostly be taking things out rather than adding more detail, anything that is not adding to the story can be removed. For example I want to do a little more to the shapes of leaves and sky but to do that now will result in the colours becoming dirty, it will be easy to refine when dry. From start to finish this has taken an hour and a half. To be able to paint a rough impression like this in a short period is very important in the field as the best light is often there only very briefly and you need to get it down quickly an economically so that you carry away a real feeling of the day. This will be of great value when you assemble the information to do a more finished studio work. A great bonus is that every now and again when the fates favour you your dashed off plein air will be a thing of beauty in its own right!
