I have split this into 2 parts so if you have come straight to this one then you need to go here for the first part. In this part we will see how to build on the same method to put windows into the facade of a building. Once you understand the basics then I’m sure you will be able to think of ways of taking it further but I want to only cover the very simplest cases in this post. at the end of the last part we has a row of posts… but what if they were drainpipes?
.
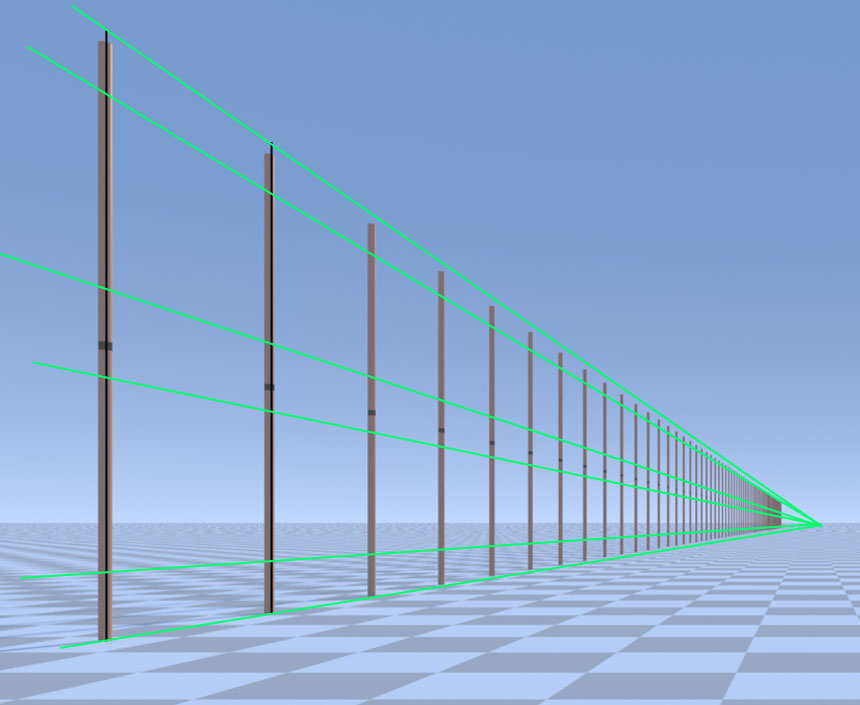
Well here is where we left off, now to make a few windows. The tops and bottoms of the windows are easy as you see by the green lines, just decide the vertical spacing (I’m having 2 rows) , make the divisions on the first pole and join them back to the vanishing point. If only the rest was as easy!
.

What I want to do is divide the space between the poles into 4 and use the centre two divisions for my window opening. So first divide one of my spaces into two by drawing the purple cross and then mark the centre back to the horizon with the red line, then I split the wall into two with the blue line.
.
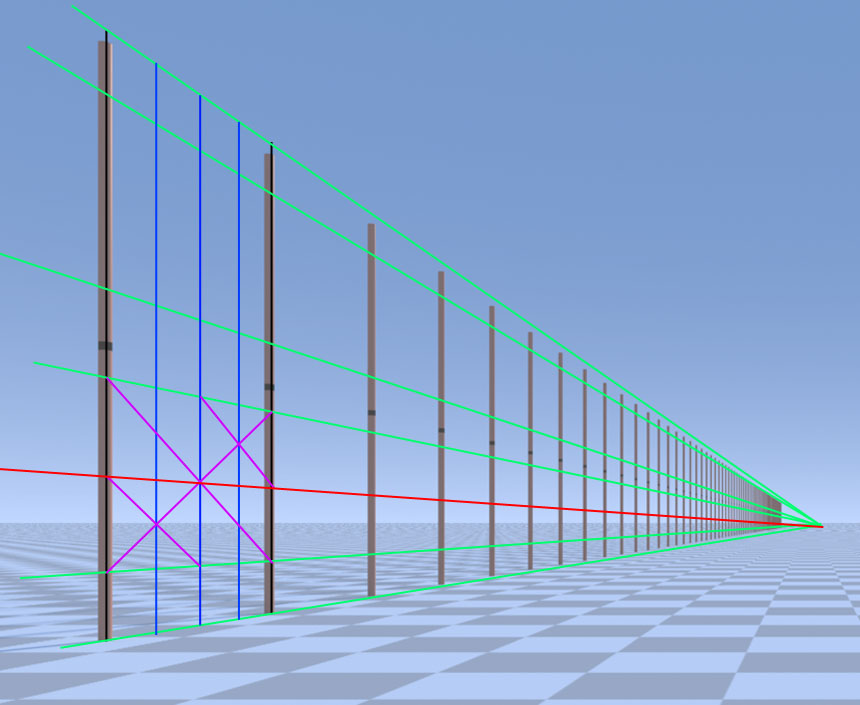
Then I draw in the other two little purple lines to divide again. The blue lines show the resulting divisions. As you see an added bonus is that it has made upper windows as well!
.
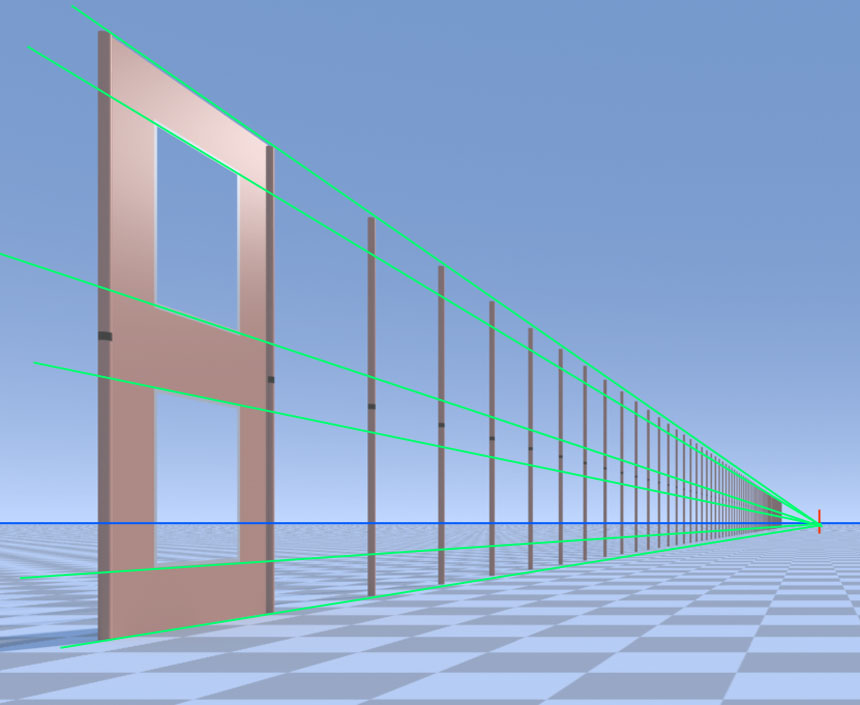
Here it is all filled in, I’ve removed the previous construction so we don’t get confused with too many lines. Next we need to add identical windows to the next section.
.
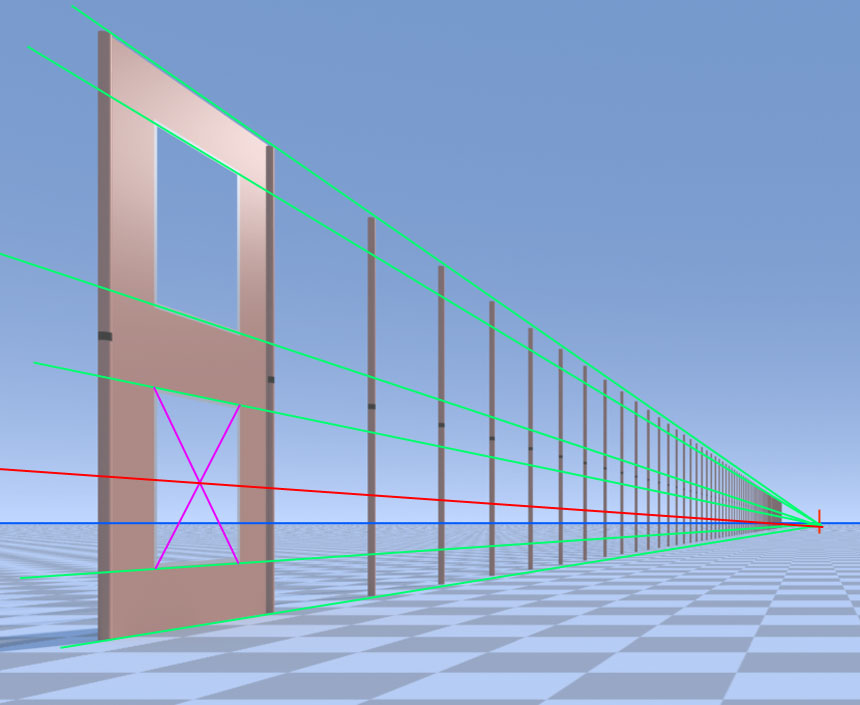
I’ve put back in my centre line by drawing the purple cross and running the red line back to the Vanishing Point.
.
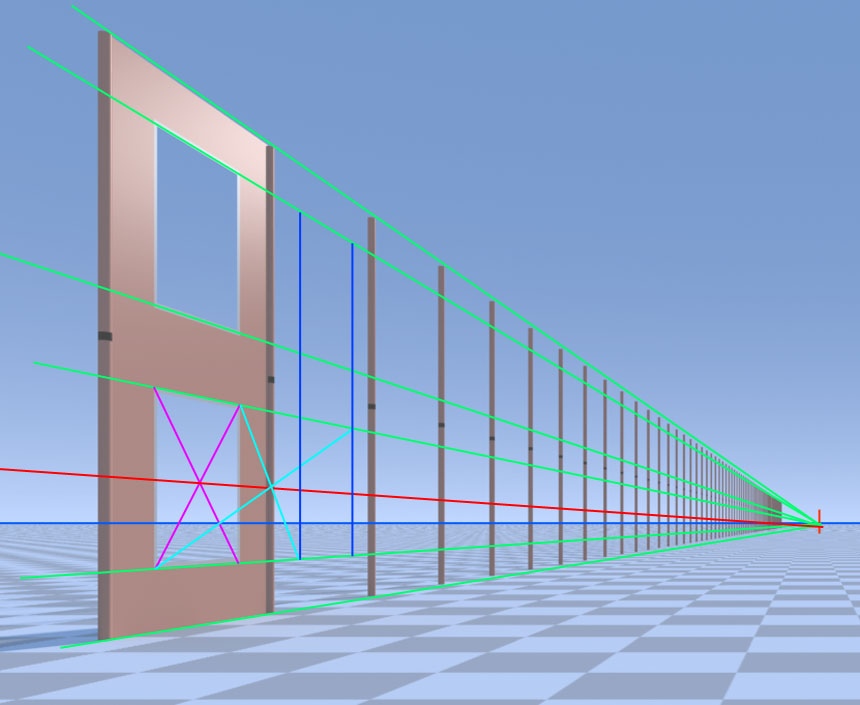
Now the tricky bit, I have drawn the first turquoise line from the bottom left of our first window through the point where the red line crosses the second pole and onwards until it hits the green line of the window top. Take your time to make sure you understand this. What you are doing is taking the rectangle made by one of the windows and the righthand bit of wall and making an identical rectangle on the other side of the second pole. Then I have only to duplicate the lefthand but of wall by drawing a line from the top right of the window through the same point on the second pole to hit the green line that marks the bottom of the windows. Then you can mark the blue lines in that make the window sides.
.
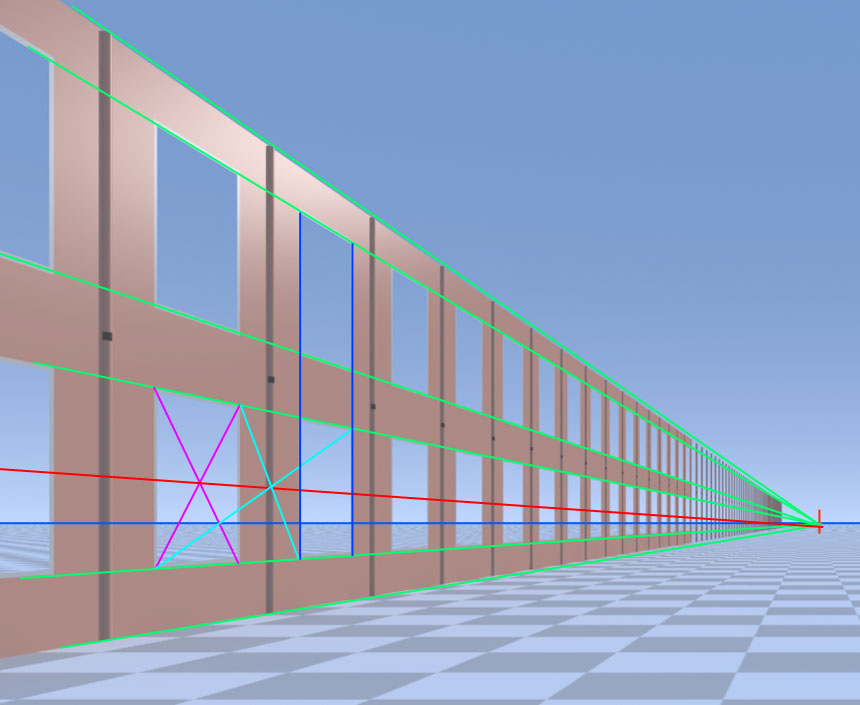
As you can see as before you can then continue to do the same thing to fill in the rest of the windows, until your patience runs out!
Thank you. I have been looking for this information for a while and your tutorial explains it very well.
I will have a few new paintings up on my website in January that may have some of this technique involved. Thanks again
Comment by ila — December 1, 2011 @ 6:31 pm
Beautifully explained. It was nice to have met you on the painting expedition.
Comment by Martin Jarvis — March 23, 2012 @ 7:29 pm
Hi Martin, good to have met you, we had a lovely day at Sonning, the weather was astonishing for March. You may be interested in the article on Spherical perspective too as it can be handy for those “impossible” views that need somehow to be cheated into being believable!
Best
Rob
Comment by admin — March 23, 2012 @ 8:05 pm
I still can’t figure out how to space the poles myself, with minimal info beyond the horizon line, vanishing point, and 1 or 2 verticals established. You’ve already done the spacing – but how do you space them to begin with?
Granted, I perused this rather quickly as I have limited time to spend on internet. So maybe I missed something?
Thanks
Comment by Grace Wisetribe — December 5, 2013 @ 8:14 pm
Hi Grace, this is explained in Pt 1! part1
Best
Rob
Comment by Rob Adams — December 6, 2013 @ 11:02 am